Getting started with Visual Studio Team Services

Visual Studio Team Services (VSTS) is a service from Microsoft which provides collaboration tools for teams, version controls (Git & TFS) and continuous integration. It’s great for a start-up or small company as they’re free for 5 users. In this post, I will introduce you the steps to start to work with VSTS.

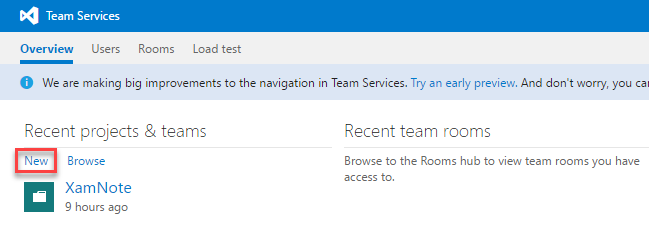
After creating your account, let’s start with creating your project. Open Overview then click New

n01

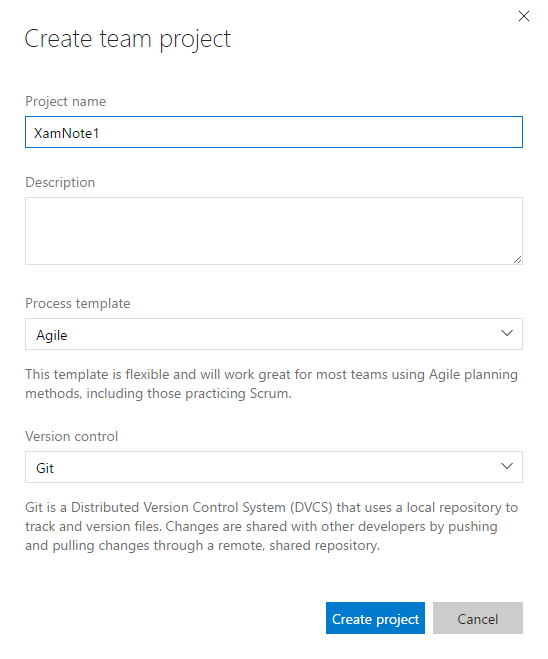
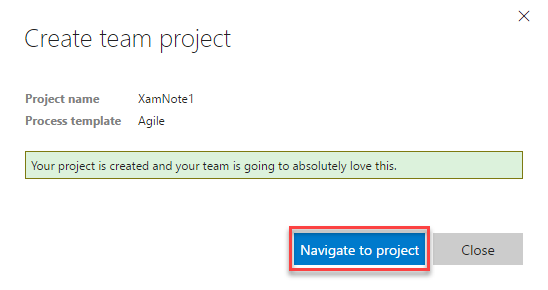
Enter project name, select process template and version control you want to use then click Create project

n02

After waiting for VSTS to create new project, just click Navigate to project to open the project

n03

Now we move to Visual Studio (VS). Open Team Explorer pane then click Connect…

01.png

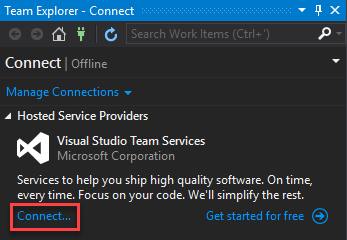
Let’s connect to VSTS, select Team Projects you want to work on then click Connect

02

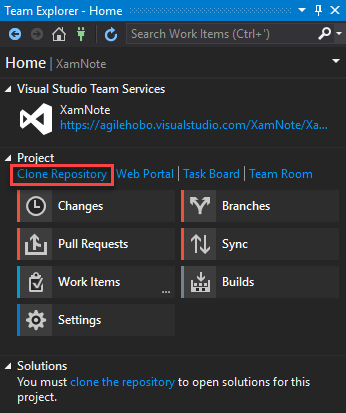
After connecting to VSTS, just select the project you want to work on the click Clone Repository

03

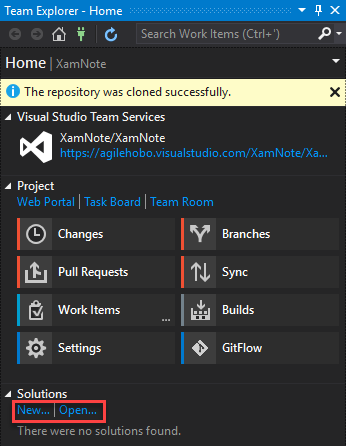
After cloning the repository, you can create new or open existing solution on your PC to start to work

04

Once you finish above steps, you can commit the code to VSTS, create work items, start tracking them and create build configuration to do continuous integration. They will come in later posts.

How to fix “Failure [INSTALL_FAILED_UPDATE_INCOMPATIBLE]”

It happened to me a few days ago. The problem was caused by using different versions of Android SDK build tool to build Xamarin.Android apps (at home I’m using v24.0.1 while at the office I’m using v23.0.3). It can be fixed by uninstalling the app manually (if it shows in application list) or re-building the app with the last Android SDK build tool you used then uninstall it manually (as the app is uninstalled improperly, it still in your device but doesn’t show up in application list). After that you can build with the other build tool.

But in the worst case the app doesn’t show up on your application list and you don’t want to waste your time to install the other build tool to just buid it to uninstall, the adb tool will be the rescuer if you follow below steps:

  1. Plug your device into your computer (Make sure you enabled Developer mode first).
  2. From command line, you enter “adb devices”. It should list all the “devices” (included emulators) are connected to your computer.
  3. Run “adb -s {DEVICE_ID} uninstall {APP_PACKAGE_NAME}” with {DEVICE_ID} is the device’s id you can get from second step and {APP_PACKAGE_NAME} is application package name.

adb tool will uninstall the app then you can build your app with new build tool.

2 ways to resolve Unsupported major.minor version 52.0 when building Xamarin.Android app

After reinstalling Windows 10 on my PC, I also update the Android SDK Build-tools to lastest version (24.0.1 at this time) and I cannot build Xamarin.Android app successful as Visual Studio shows me an error message “Unsupported major.minor version 52.0”. Googling about it, I found that it is compatible problem of JDK and Android SDK with version 52.0 means it relates to JDK 8

To resolve this problem, there are 2 ways to do it.

Upgrade to JDK 8: I prefer this way as on Windows 10 64-bit, Android Studio will run 64-bit version by default and it cannot use JDK 7 32-bit which is installed together with Visual Studio 2015. So I download JDK 8 64-bit, install it then update Xamarin configuration

VS Configuration

Stick with JDK 7: You need to uninstall Android SDK Build-tools version 24.x.x and install version 23.0.3 (if you didn’t it yet)

Android SDK